Configure Datility email in Mozilla Thunderbird
This tutorial was written for Mozilla Thunderbird v24 on Windows XP. Screens and options may vary slightly for different versions of Windows or Mozilla Thunderbird.
Note: This tutorial requires Mozilla Thunderbird to be installed on your computer. If you have not already done so, download and install it from Mozilla's web site (http://www.mozilla.org/en-US/thunderbird/) first.
-
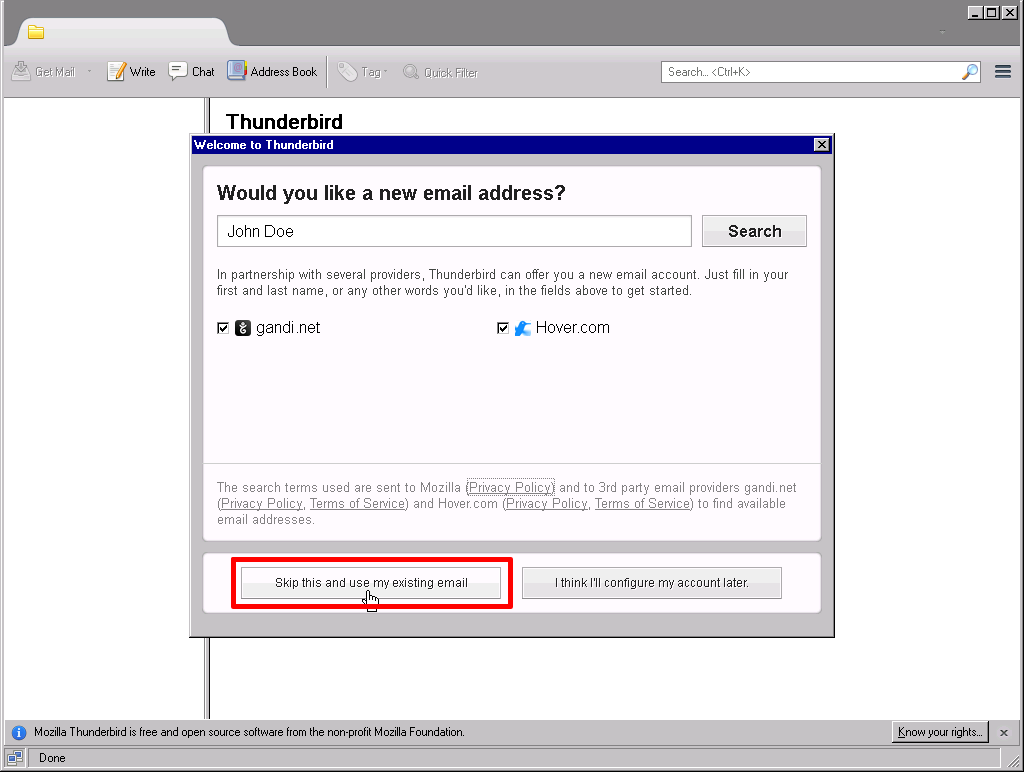
Open Mozilla Thunderbird.

-
Click on the "Skip this and use my existing email" button.
-
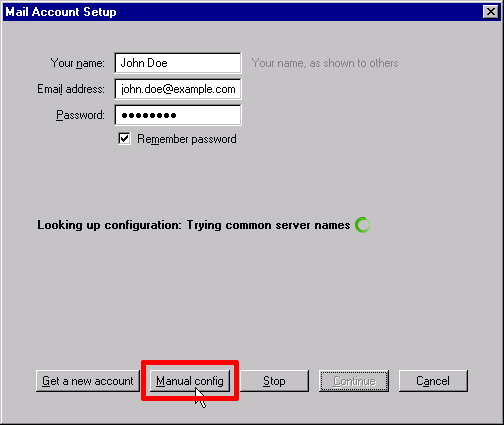
Enter the following information and then click "Continue".
- Your name: Enter your name as want it to appear on your outgoing messages.
- Email address: Enter your full Datility email address.
- Password: Enter your Datility email password.
- Check "Remember password."

-
Click "Manual config" button to cancel looking up the configuration.
-
Enter the following settings and then click "Done".
Note: If you want to use IMAP instead of POP3, be sure to change the box next to "Incoming:" to IMAP before entering the "Server hostname".
Incoming server information:
- Server hostname: mail.dnihost.net
- Port: 143 (or 110 for POP3)
- SSL: STARTTLS
- Authentication: Encrypted password
Outgoing server information:
- Server hostname: mail.dnihost.net
- Port: 587
- SSL: STARTTLS
- Authentication: Encrypted password
- Username: Enter your full Datility email address.
A System Integration window may prompt you to set Thunderbird as your default mail client. Click "OK".

-
A System Integration window may prompt you to set Thunderbird as your default mail client. Click "OK".
-
Thunderbird will connect to the Datility email servers and start downloading your email messages and folders.
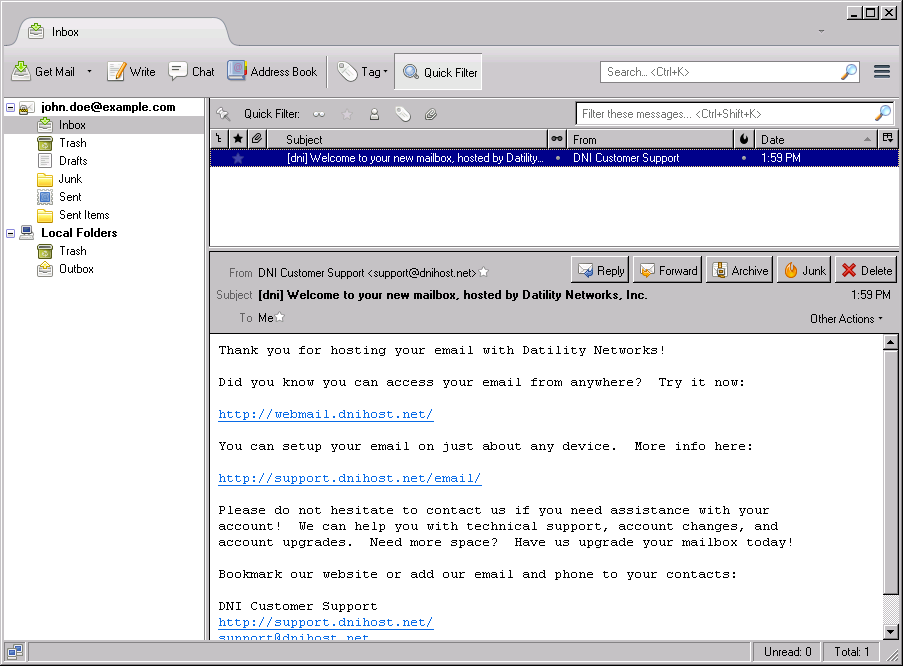
Your email account configuration is complete! You can now send and receive your Datility email in Mozilla Thunderbird.