Use Datility mail from Google Mail
Follow the steps below to send and receive your Datility email through your Google Mail account using POP3.
-
Log in to your Google Mail account.

-
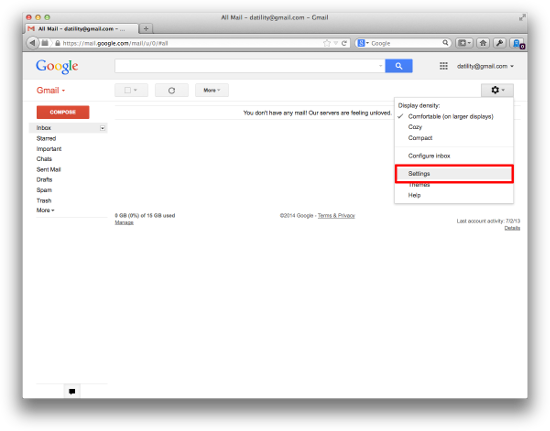
Click on the gear icon at the top-right hand corner of the page, then click on Settings.

-
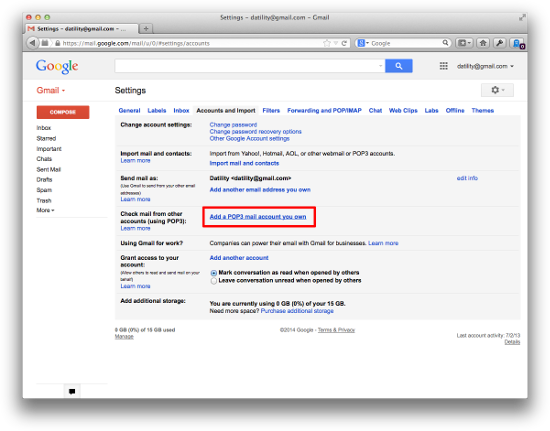
Go to the "Accounts and Import" tab. Click "Add a POP3 mail account you own".

-
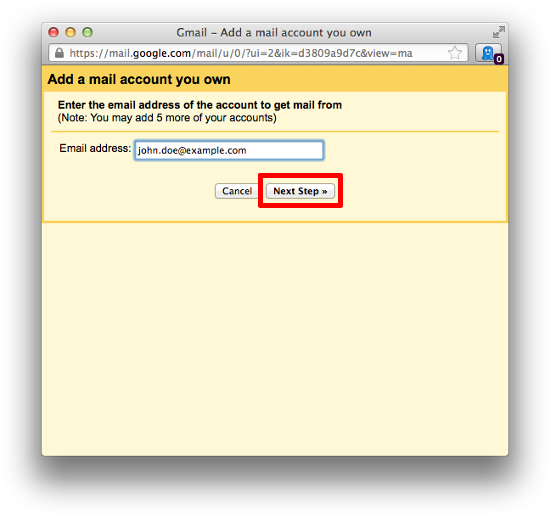
Enter your Datility email address and click "Next Step".

-
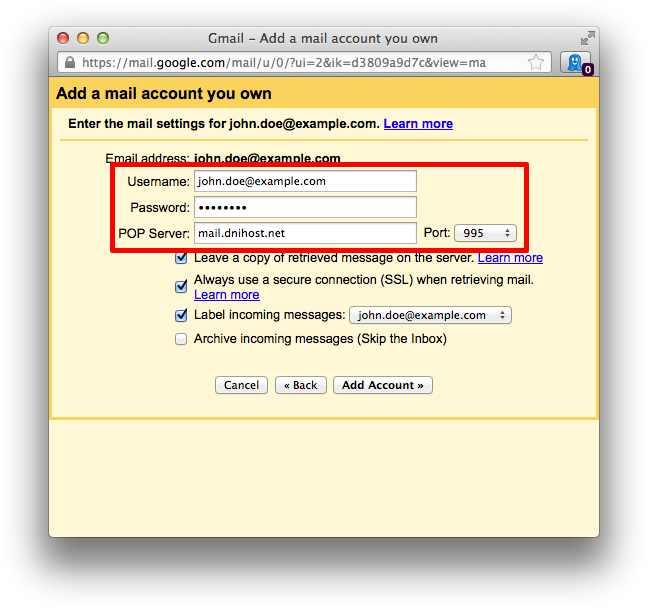
Enter the following information, then click "Add Account".
- Username: Enter your full Datility email address.
- Password: Enter your Datility email password.
- POP Server: mail.dnihost.net
- Port: 110
- Check "Leave a copy of retrieved messages on the server." (optional)
- Check "Always use a secure connection (SSL) when retrieving mail."
- Check "Label incoming messages" (optional)

-
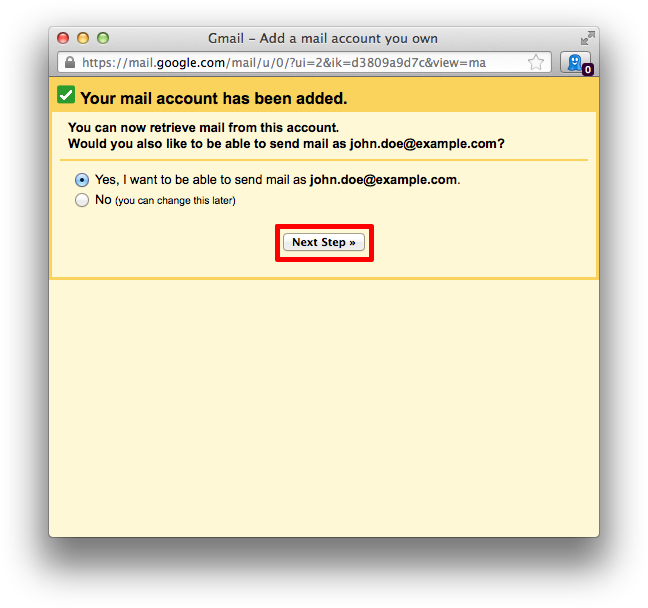
Google Mail can send message that appear to come from your Datility email address. If you would like to do this, choose "Yes". If not, choose "No". Click "Next Step".
Note: If you chose "No", you are finished. If you chose "Yes", continue below.

-
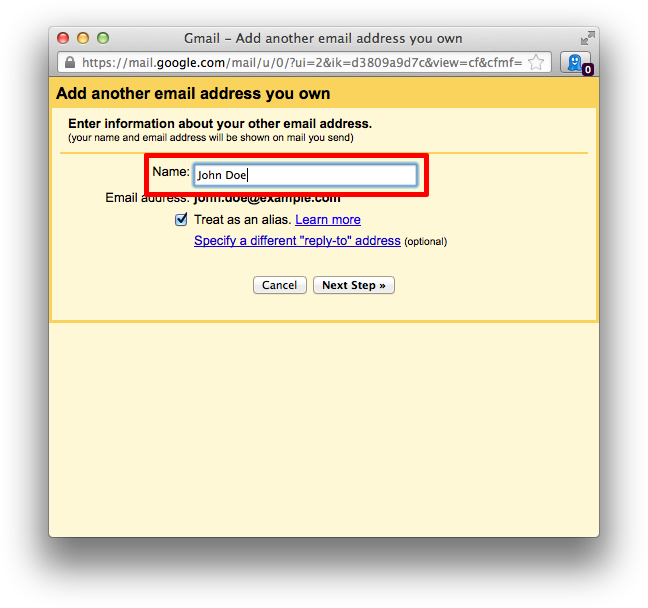
Type your name as you wish it to appear on your outgoing messages. Click "Next Step".

-
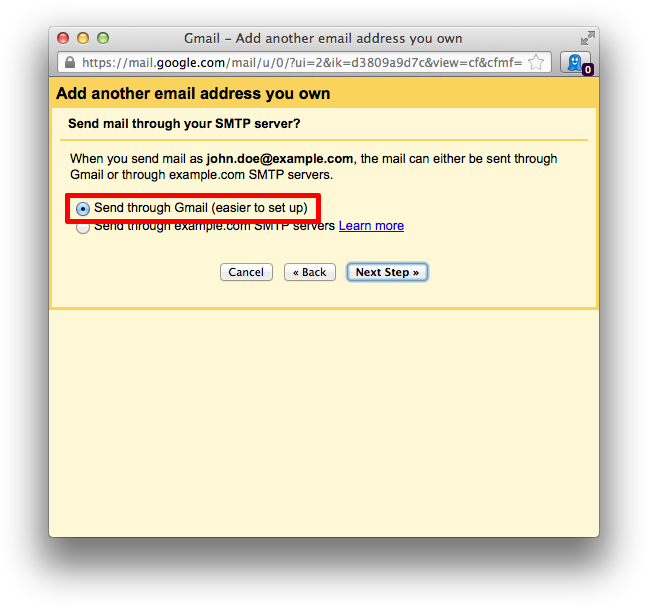
Select "Send through Gmail (easier to setup)". Click "Next Step".

-
Click "Send Verification".

-
Log into your Datility email (webmail at https://webmail.dnihost.net/) and copy the confirmation code or click on the confirmation link.

-
Go back to Google Mail and enter your confirmation code. Click Verify.

Setup complete! You should now be able send and receive your Datility email in your Google Mail account.