Configure Datility email on your iPad or iPhone
NOTE: Click here to view a printer-friendly version of this tutorial.
Configure Datility email on your iPad or iPhone
This tutorial will show you how to set up your Datility email on your iPhone or iPad. The process is the same on iPad and iPhone, though it can differ slightly depending on the model and iOS version.
-
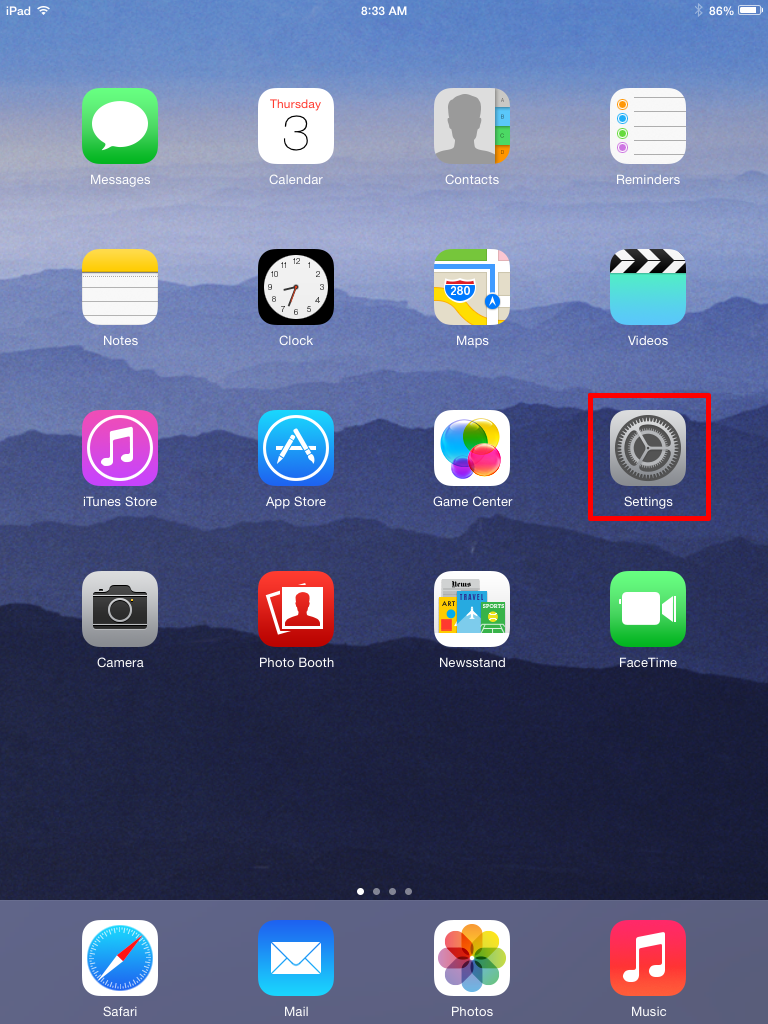
Tap "Settings" on your home screen.

-
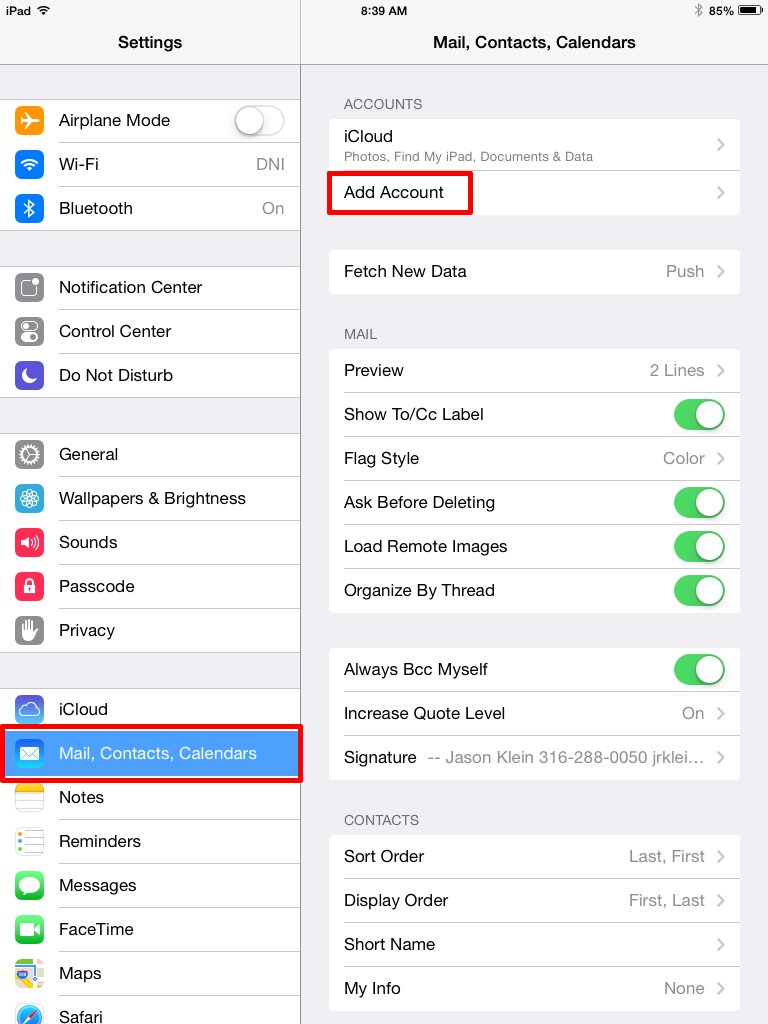
Scroll down and tap "Mail, Contacts, Calendars". Tap "Add Account".
-
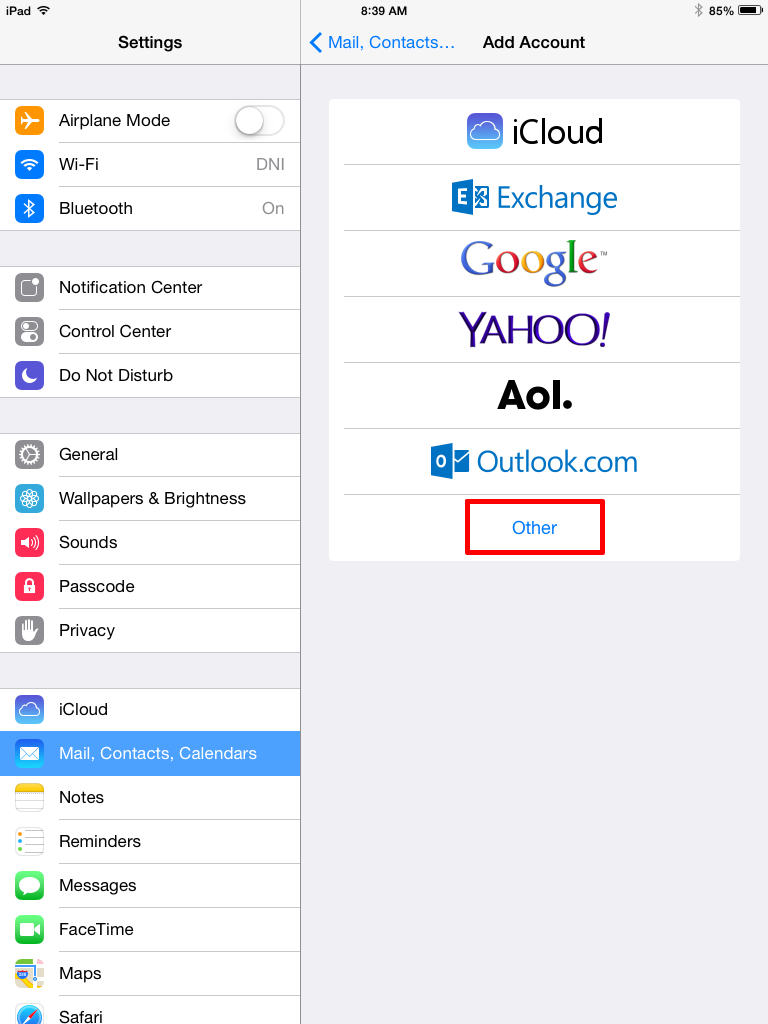
Tap "Other".
-
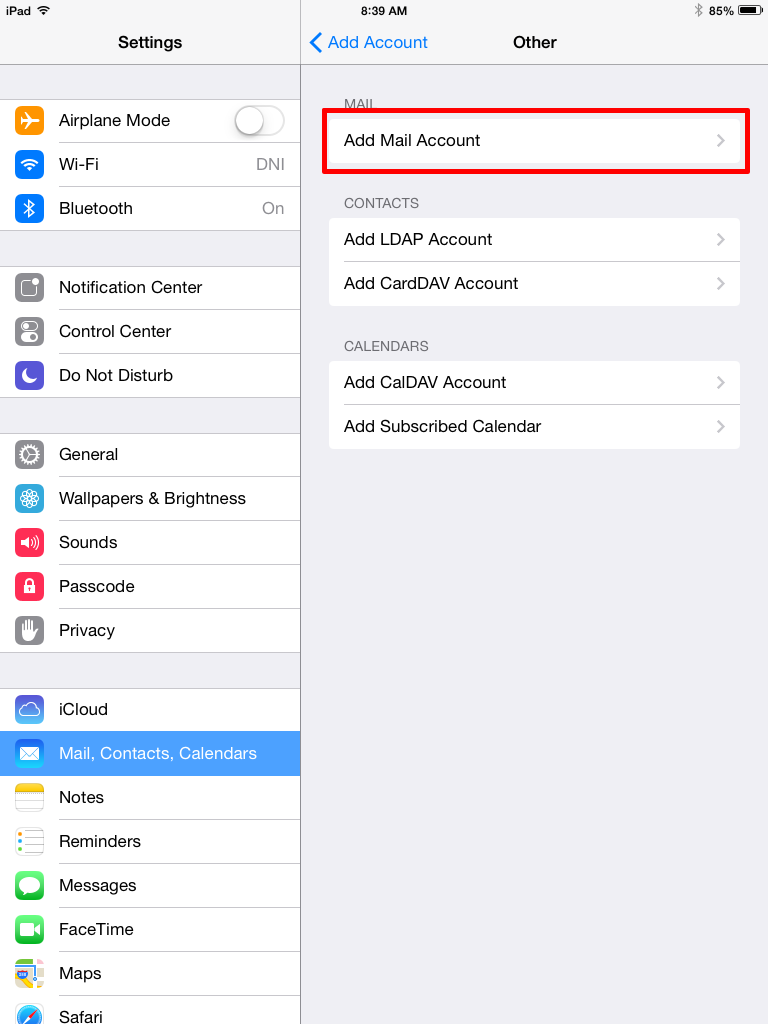
Tap "Add Mail Account".
-
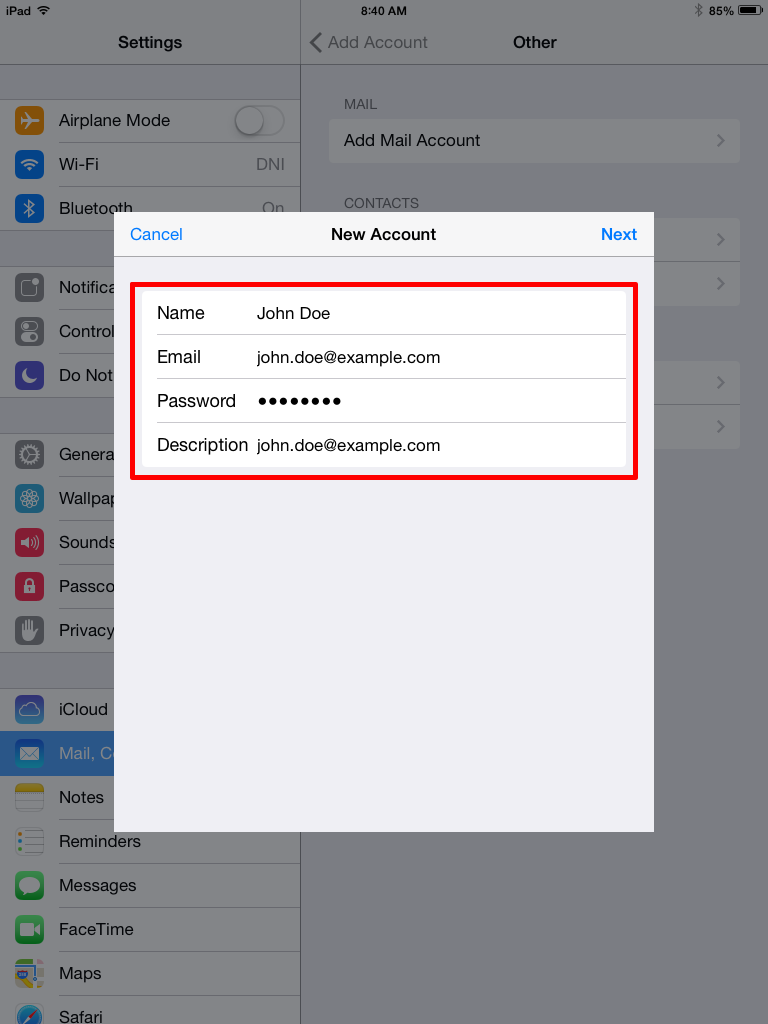
Enter the following information, and then tap "Next":
-
Name: Enter your name as you want it to appear when you send email.
-
Email: Enter your full Datility email address.
-
Password: Enter your Datility email password.
-
Description: This will be used to identify this email account on your iPad or iPhone. You can enter anything you like here (e.g. Work Email, Home Email, your email address, etc).
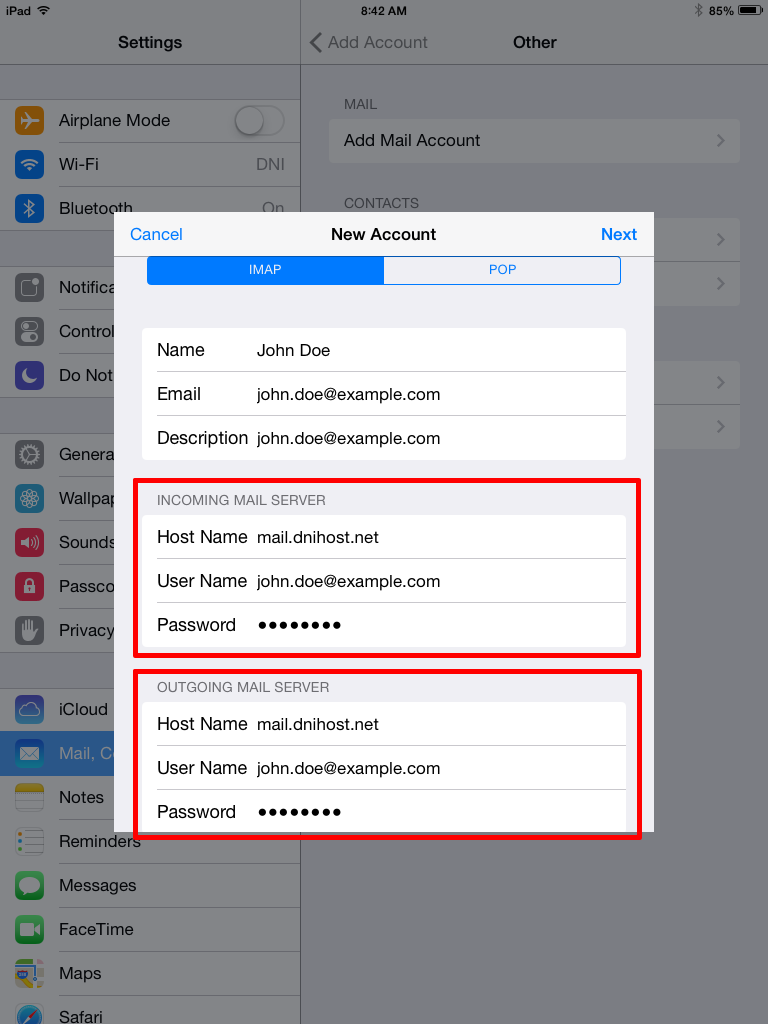
NOTE: The Datility email service supports both IMAP and POP. We recommend that you choose IMAP because it will keep messages in sync between your iPad or iPhone any other computers or devices that you use with IMAP to access your email account. The settings that follow are the same for both IMAP and POP.
-
In both the "Incoming Mail Server" and the "Outgoing Mail Server" sections, enter the following information, and then tap Next:
Be aware, even though your device may say the "Outgoing Mail Server" settings are optional, you will not be able to send e-mail messages if they are left blank.
-
Host Name: mail.dnihost.net
-
User Name: Enter your full Datility email address.
-
Password: Enter your Datility email password.
Note: Your device will verify your email account settings. Please be patient, as this may take several minutes.
If you receive an error indicating that you Cannot Connect Using SSL, something is wrong. We use SSL to help protect the privacy of your email. Please contact us to review your settings.
-
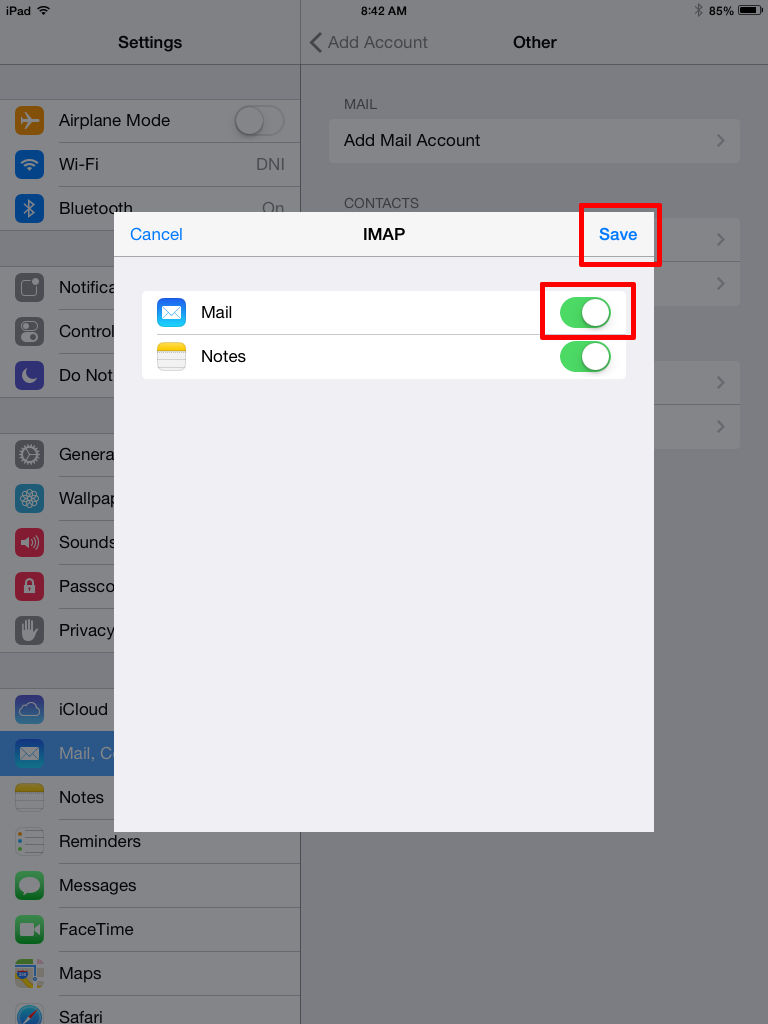
Make sure that Mail is turned on. Click Save.
Note: Notes will be turned on by default. Most users can leave this turned on, but you can turn Notes off if you prefer. Leaving Notes turned on will save a copy of your iPad or iPhone notes in your email account.
-
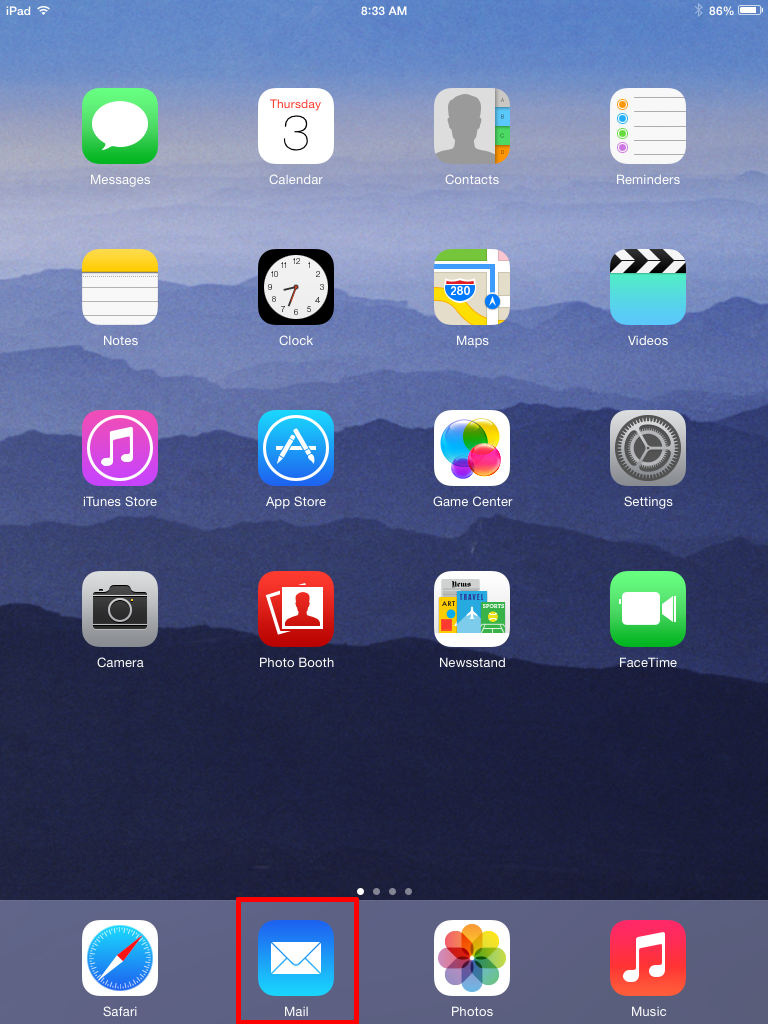
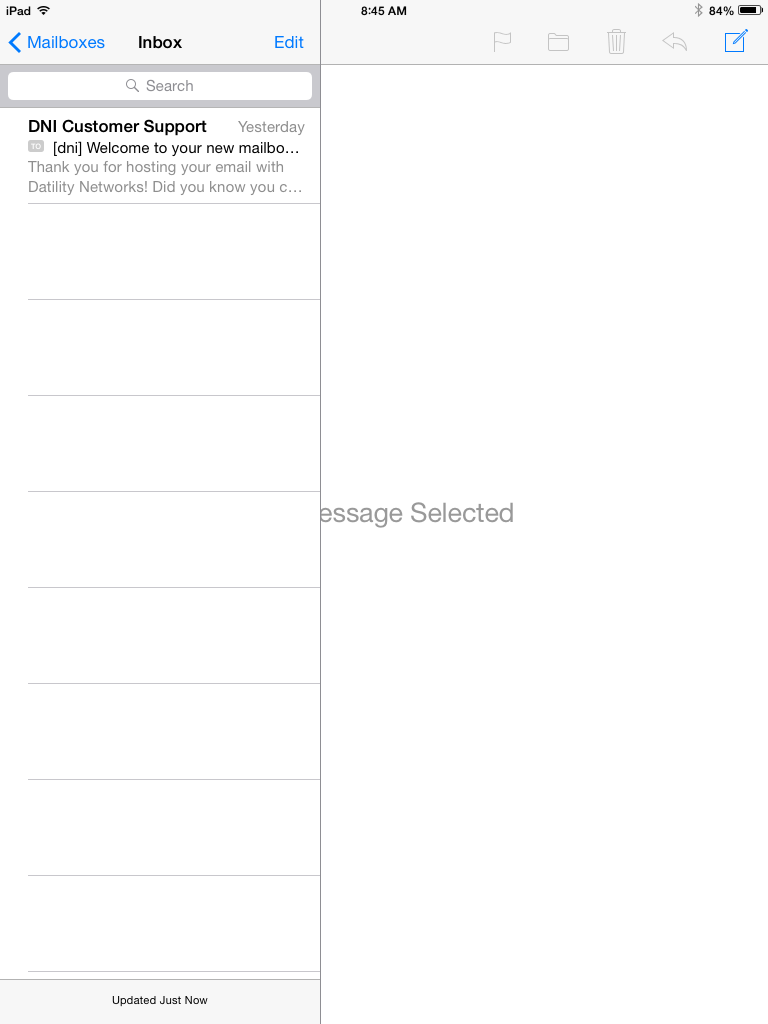
Tap "Mail" on your home screen.
-
You should see messages in your mailbox. If this is a new mailbox, you will have a welcome message from Datility.
Your email account configuration is complete! You can now send and receive your Datility email on your Apple device.