Configure Datility email on your Android device
This tutorial will show you how to set up your Datility email on your Android smartphone.
These screenshots were taken on a Nexus 7 tablet running Android OS 4.4. There will be slight differences depending on your device and Android OS version.
-
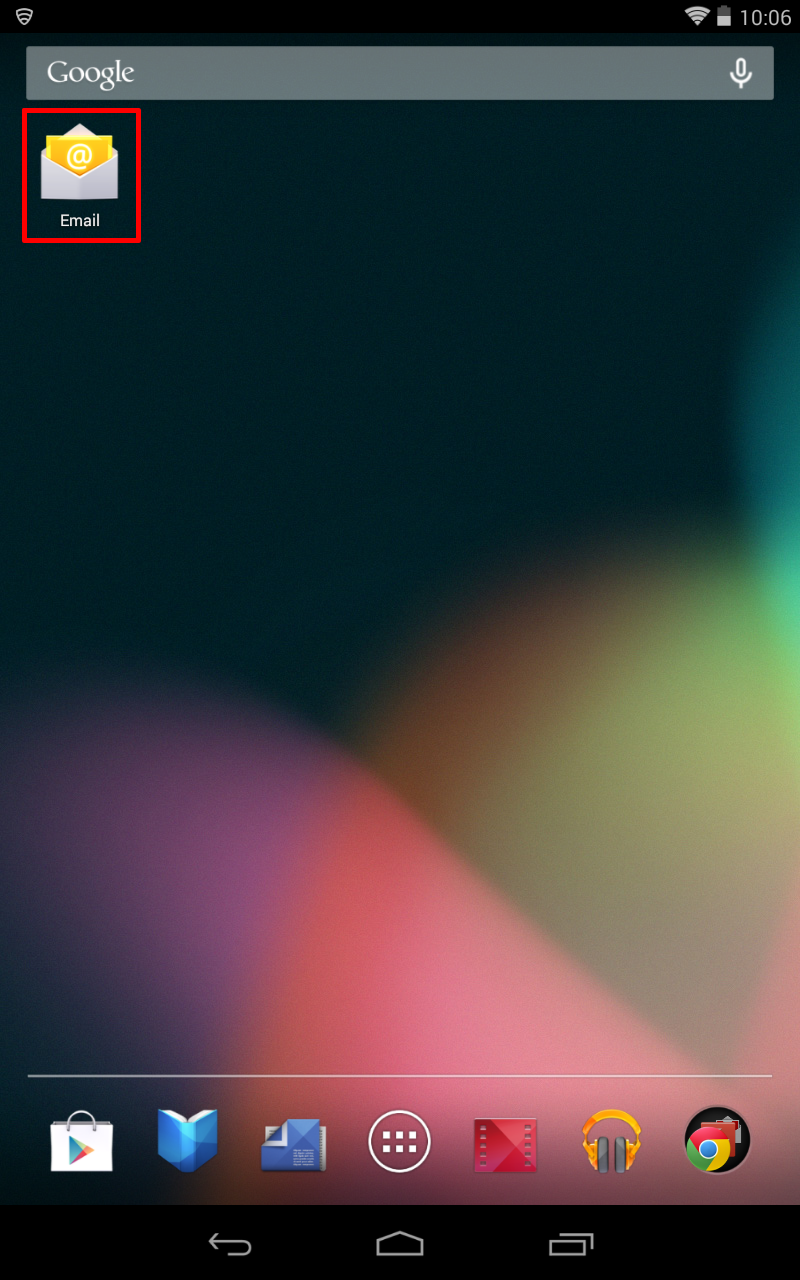
Go to the main screen and tap "Email".
NOTE: If this the first time you have opened Email, you will be taken directly to the new account wizard. Skip to step 4.

-
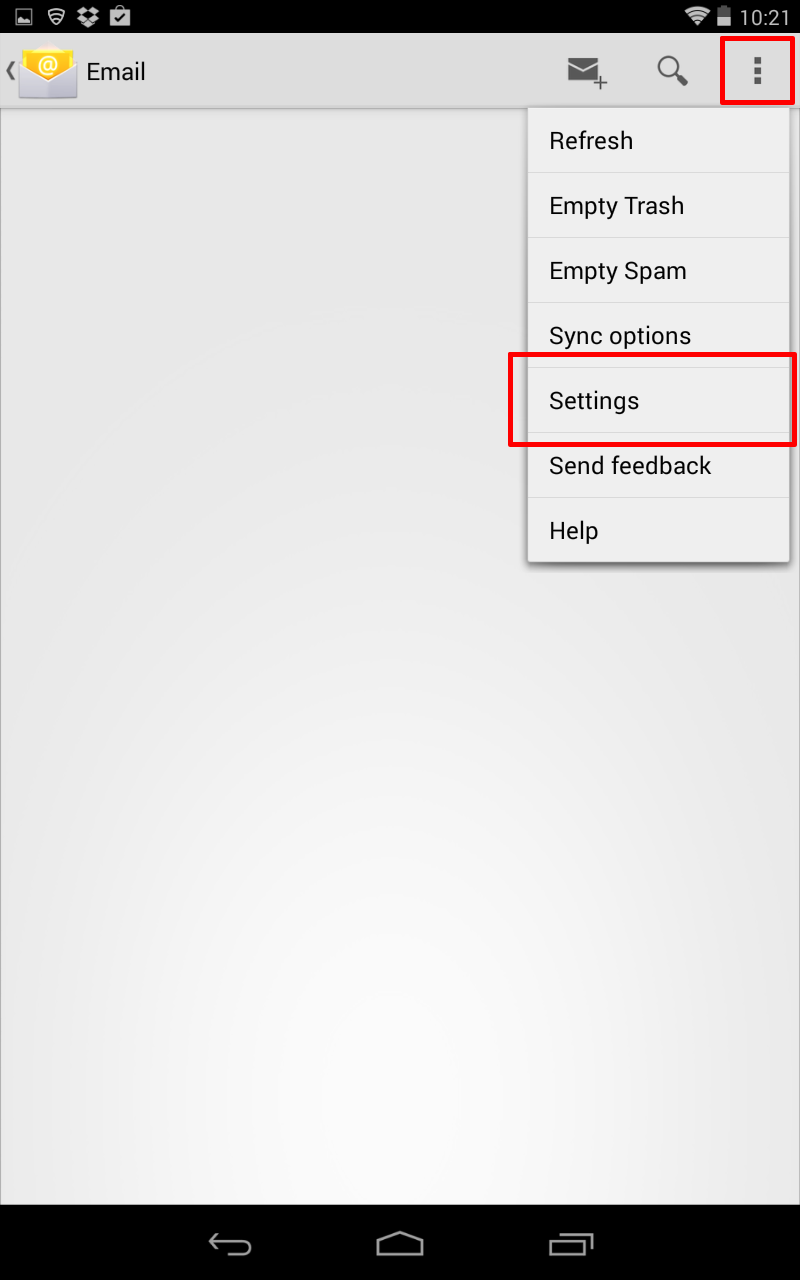
Press the Menu button, and then tap Settings.
NOTE: On certain devices, the Menu button is not part of your screen. It is located below the screen to the left of the Home button.
-
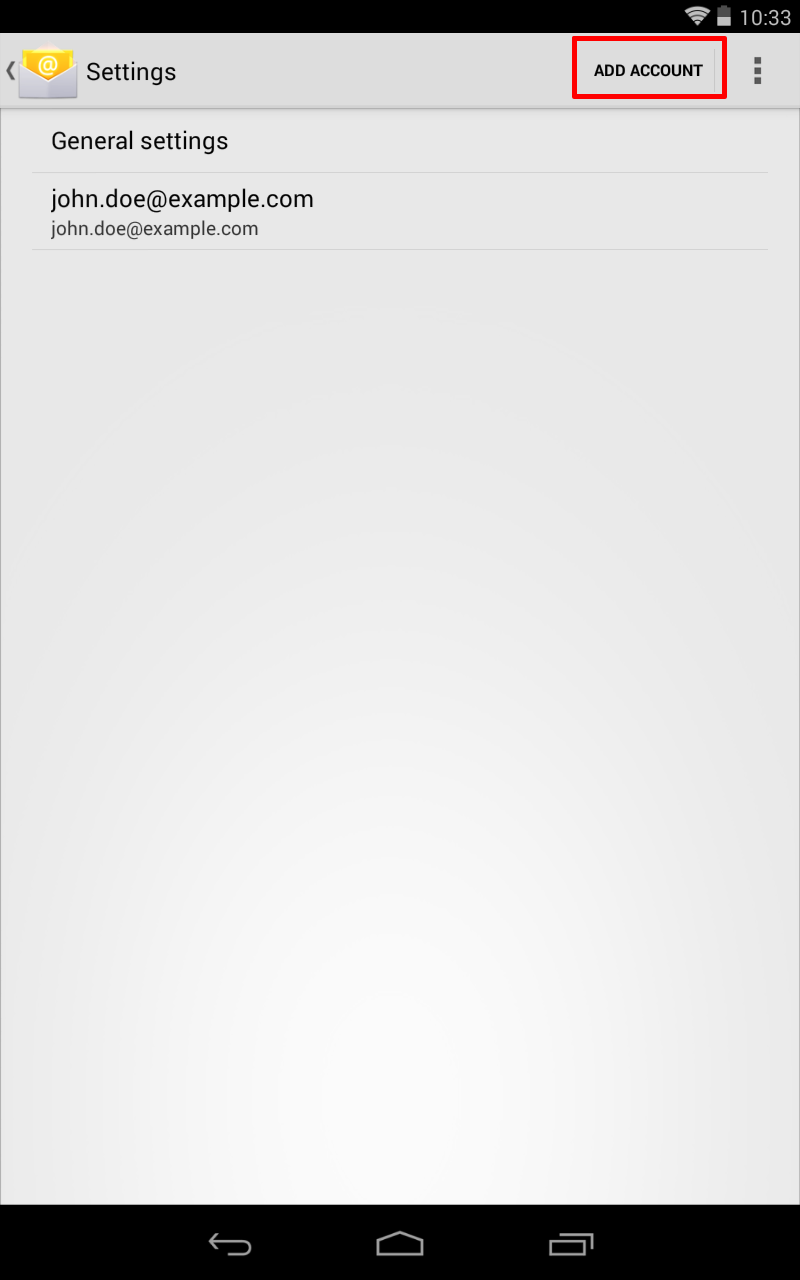
Your existing email accounts will be displayed. Tap the "Add Account" (or plus "+") button in the top-right corner of the screen.
-
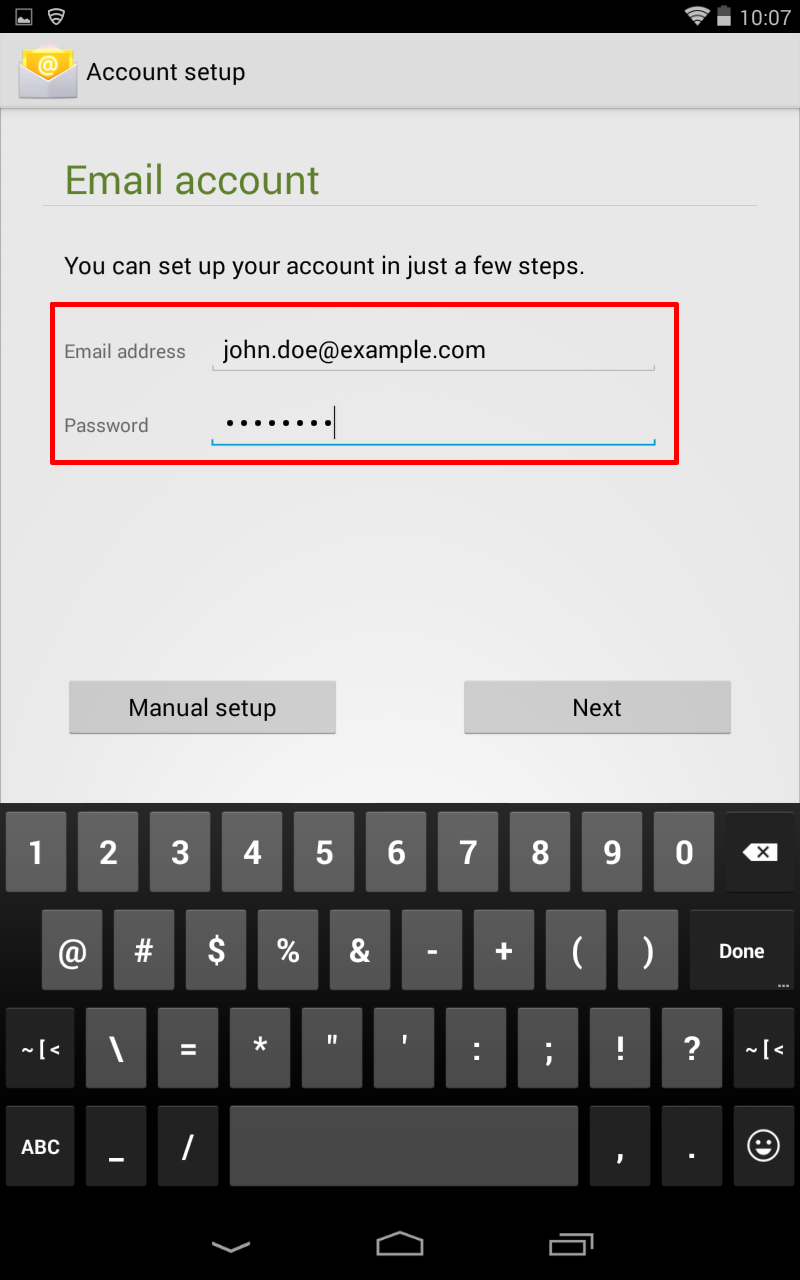
Type your full Datility email address and your Datility email password. Tap "Next".
-
Tap "IMAP" account type.
NOTE: The Datility email service supports both IMAP and POP. We recommend that you choose IMAP because it will keep messages in sync between your Android device any other computers or devices that you use with IMAP to access your email account. The settings that follow are the same for both IMAP and POP, excluding the port numbers provided in step 9.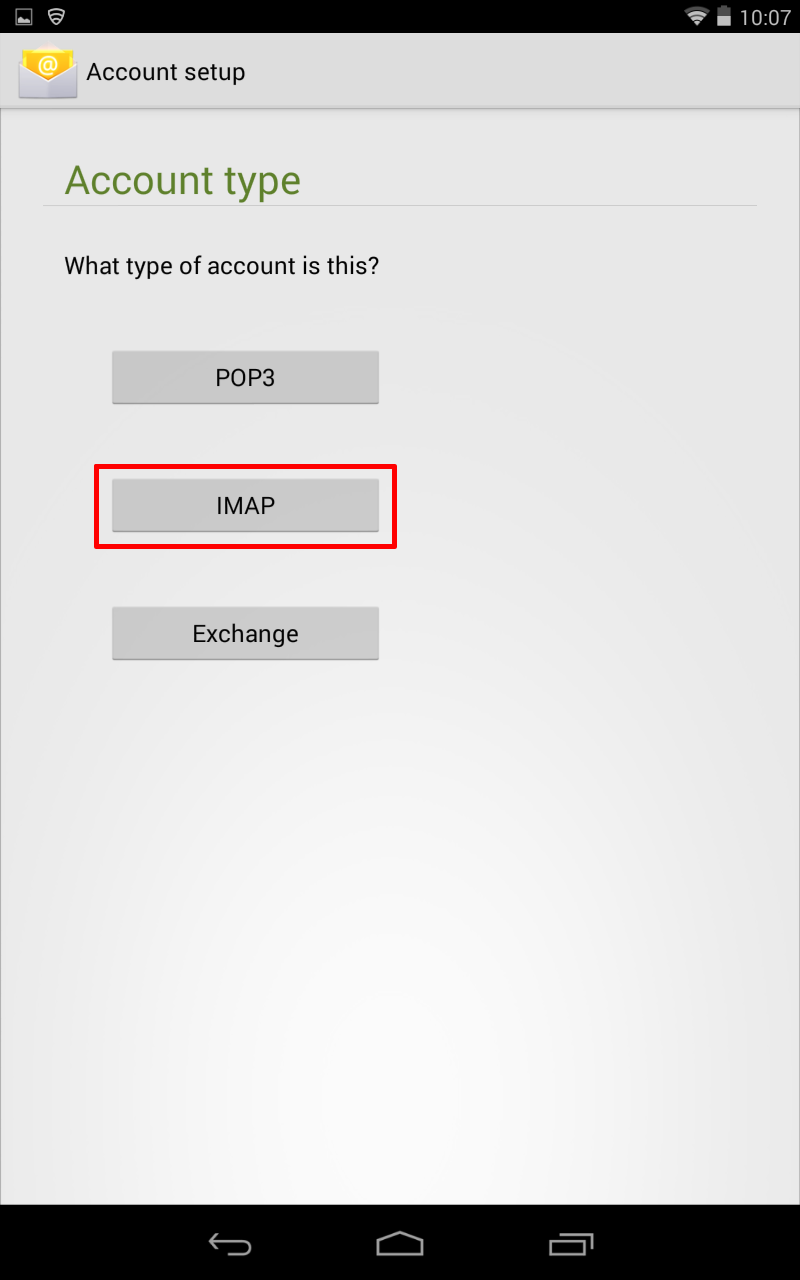
-
Enter the following Incoming server settings, then tap "Next".
- Username: Enter your Datility email address
- Password: Enter your Datility email password
- Server: mail.dnihost.net
- Security type: STARTTLS
- Port: 143 (or 110 for POP3)
Note: Your Incoming server settings will be tested.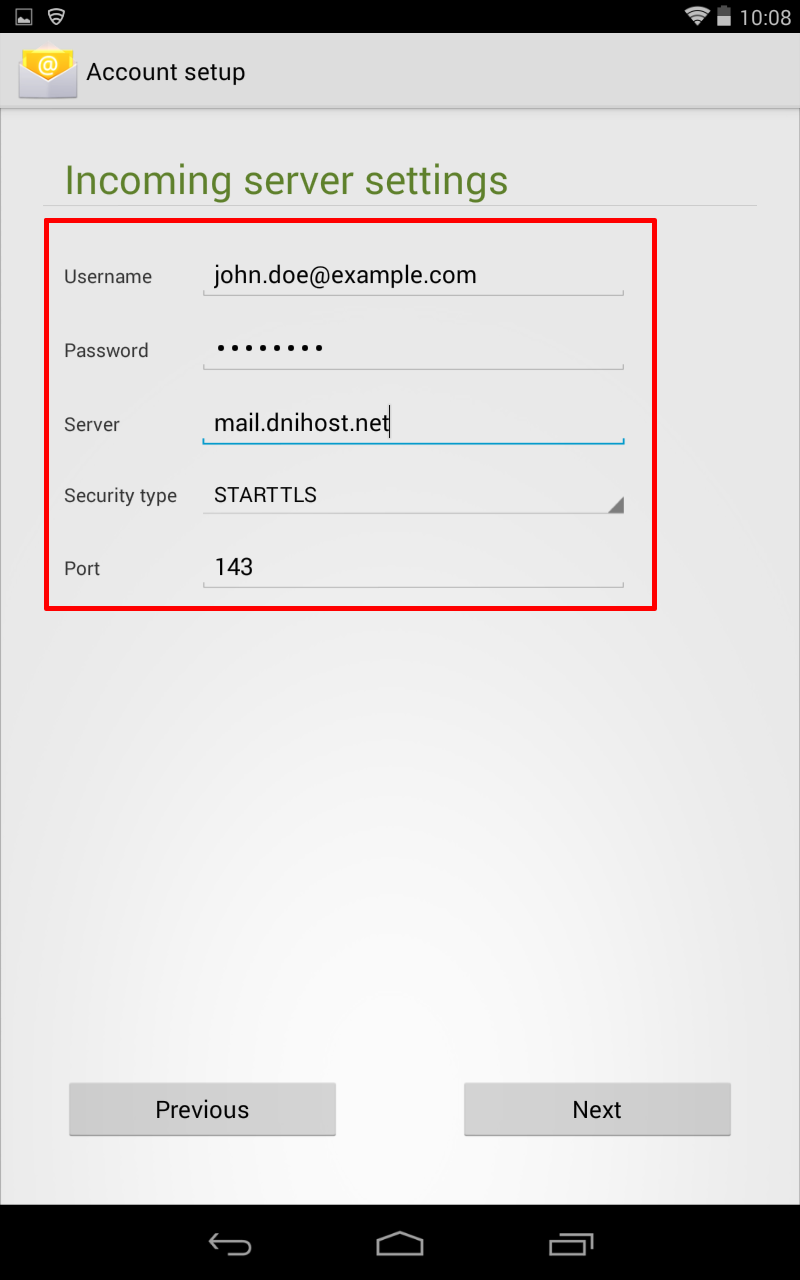
-
Enter the following Outgoing server settings, then tap "Next".
- SMTP server: mail.dnihost.net
- Security type: STARTTLS
- Port: 587
- Check "Require signin"
- Username: Enter your Datility email address
- Password: Enter your Datility email password
Note: Your Outgoing server settings will be tested.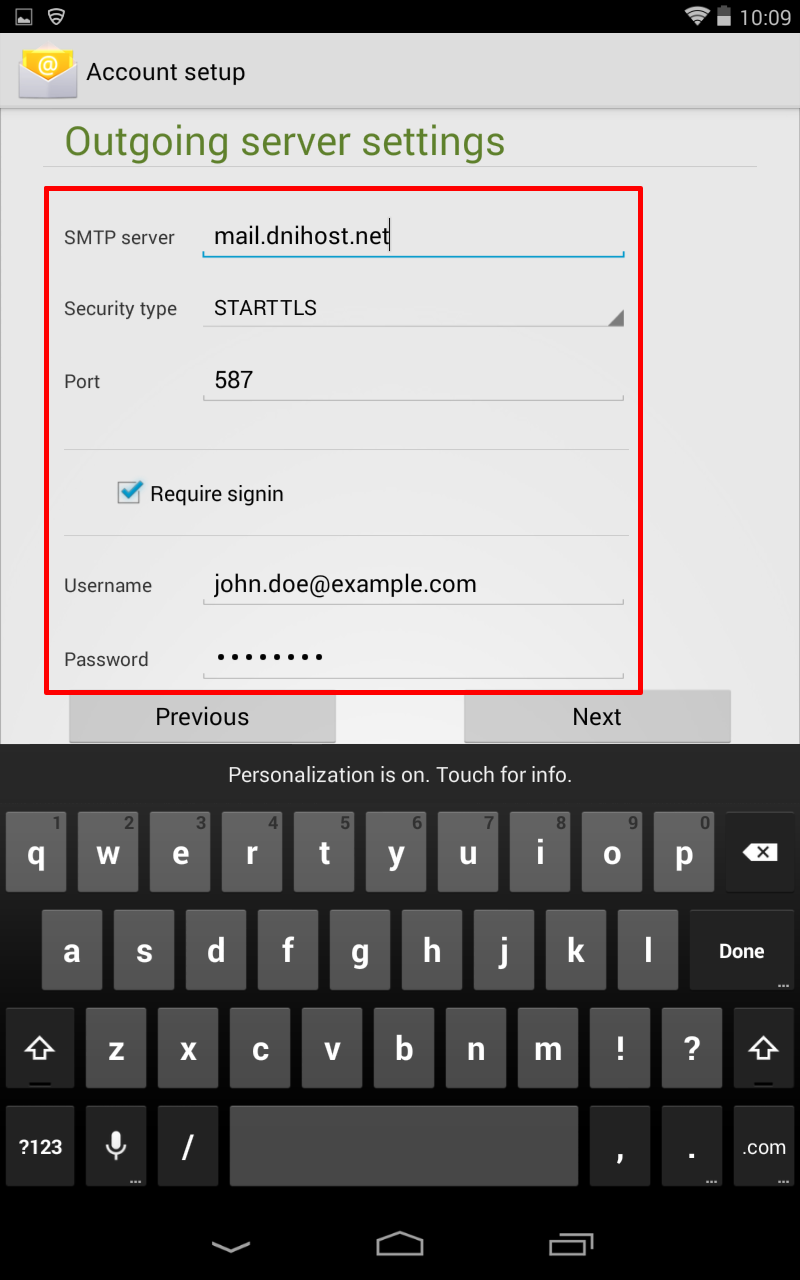
-
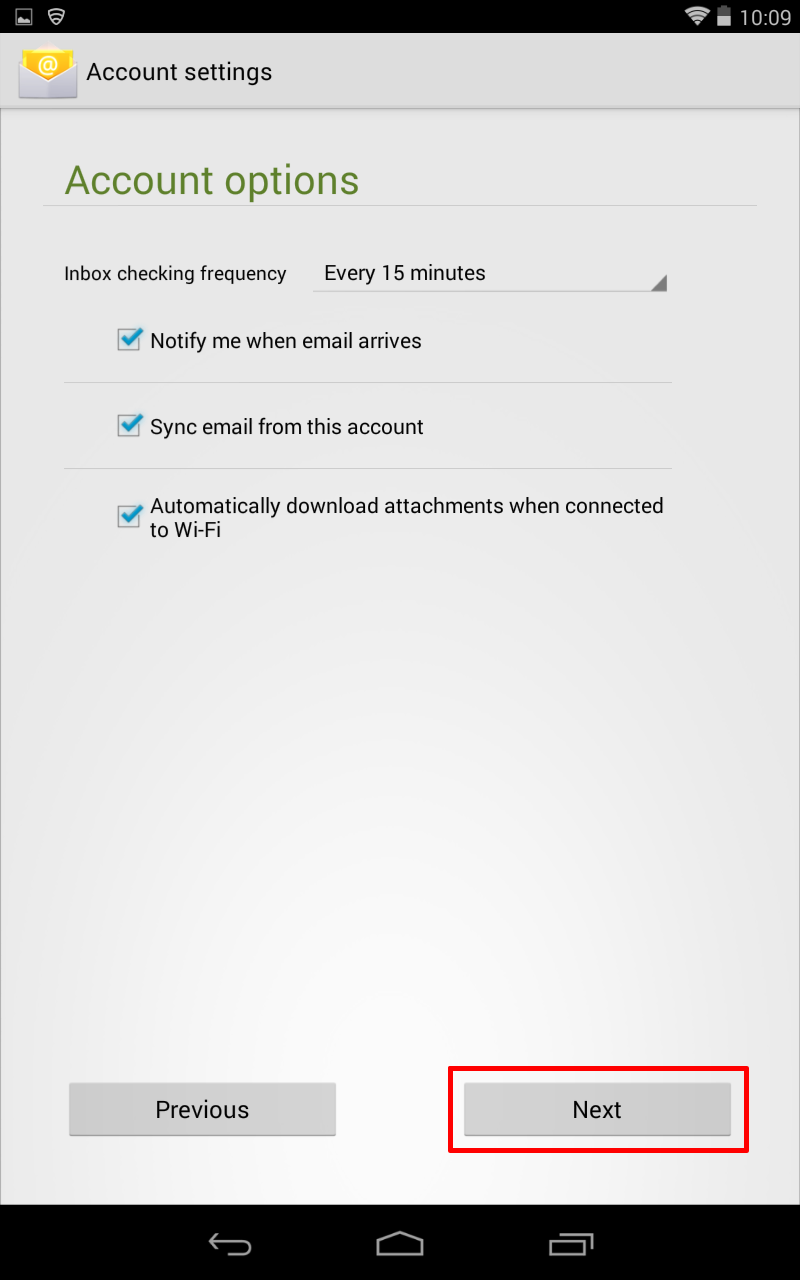
Adjust your Account options. The default settings are usually fine. When finished, tap "Next".
-
Enter the following Account information, then click "Next".
- Give this account a name: Enter your Datility email address
- Your name: Enter your name as you want it to appear when you send email

-
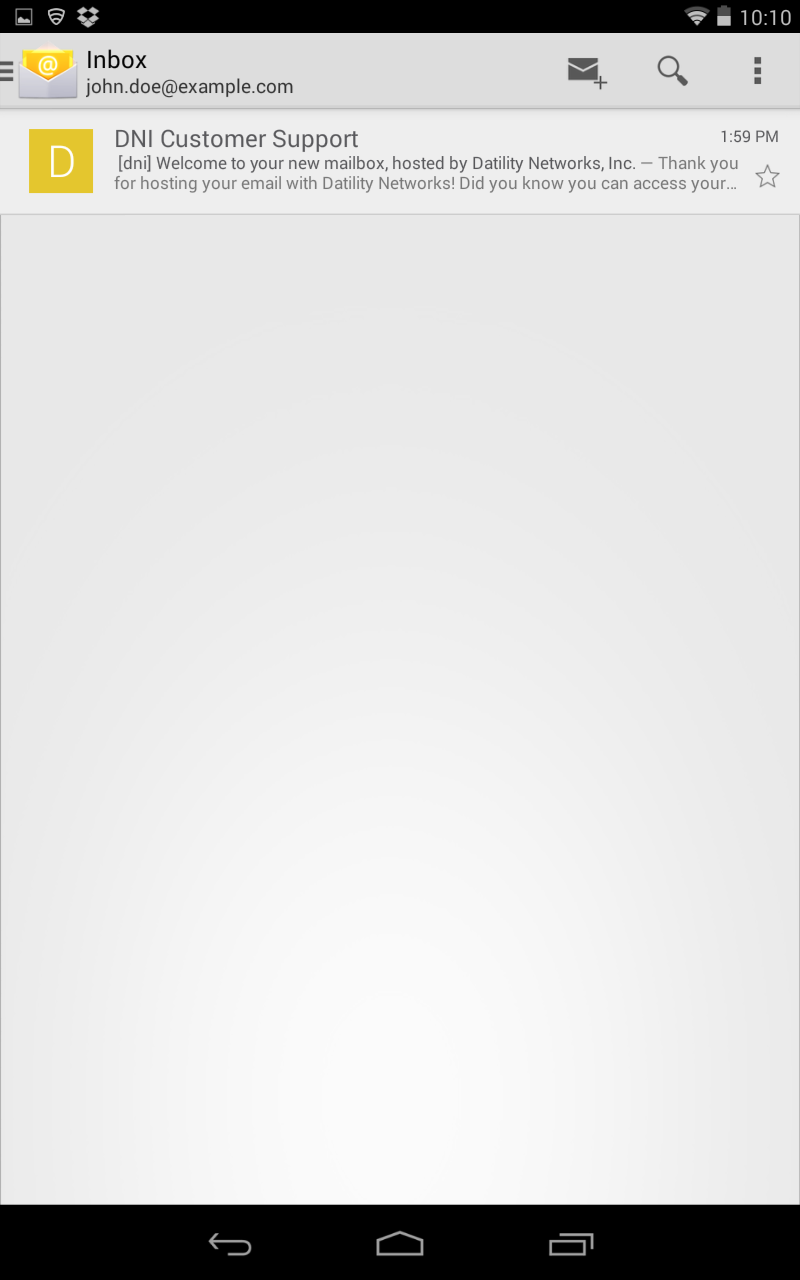
You should see messages in your mailbox. If this is a new mailbox, you will have a welcome message from Datility.
Your email account configuration is complete! You can now send and receive your Datility email on your Android device.