This step by step tutorial walks you through configuration of your email account in the Outlook Express email client for use with your DNI email account.
-
Click "Tools"
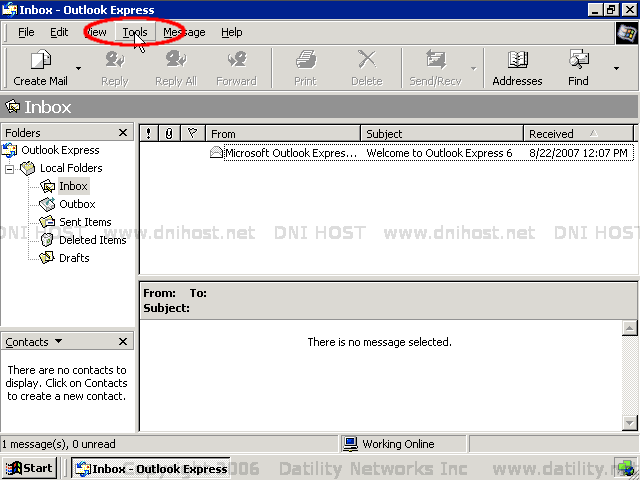
After you have opened your Outlook Express email client, begin by choosing the "Tools" dropdown menu.

-
Click "Accounts"
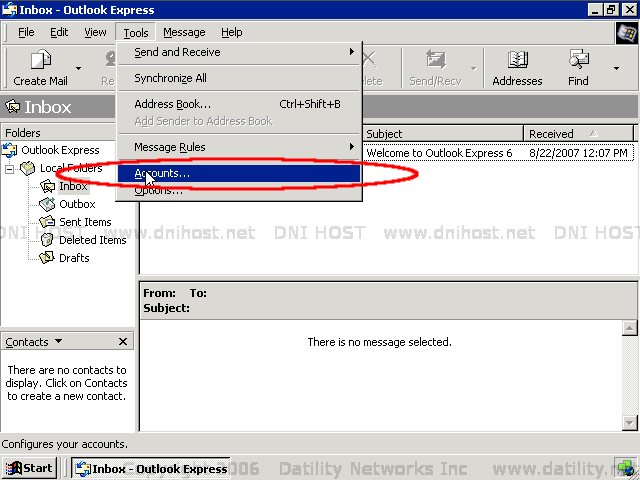
Next, click on the "Accounts" menu item to view your Internet Accounts setup window.
-
Click "Add", then click "Mail..."
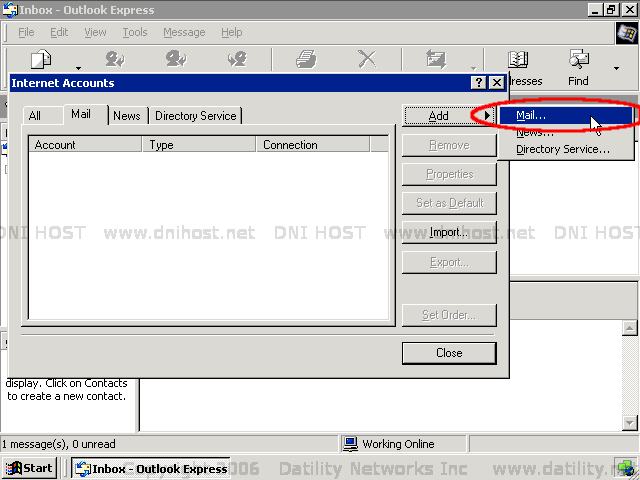
You should see an Internet Accounts setup window like the one above. Click on the "Add" button, then click on the "Mail..." option.
NOTE: When the Internet Accounts setup window appears (see above), click the "Mail" tab to view the list of email accounts that have been setup in Outlook Express. We highly recommend that you remove any mail accounts you no longer use! Remove the mail account for your DNI email address too, since this tutorial will walk you through the recreation of the mail account for your DNI email address. Unless you use Outlook Express to check another email address, the list of Mail accounts should be empty before you continue.
-
Enter your display name, then click "Next"
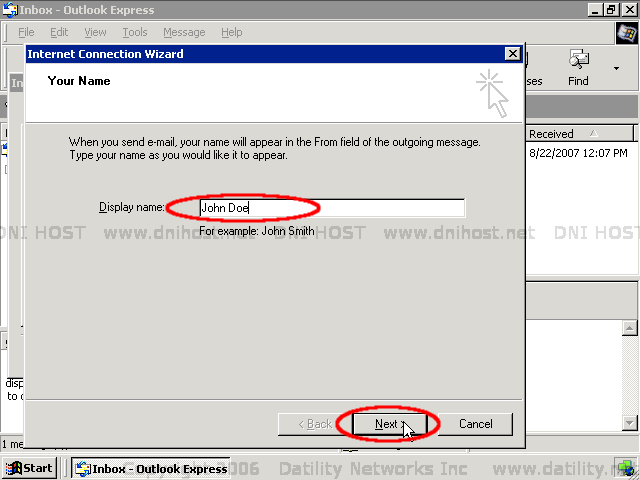
Enter your name in the "Display Name" field exactly as you want it to appear to others. This is the name others will see each time they receive an email message from you. Click "Next" to continue.
-
Enter your email address, then click "Next"
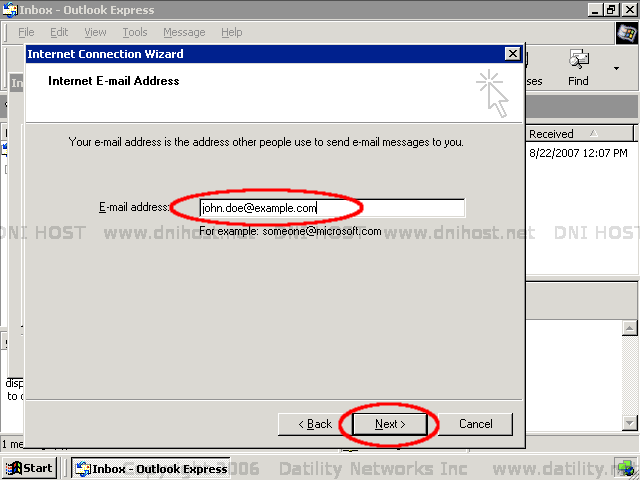
Enter your email address in the "E-mail address" field. This is the email address others will see each time they receive an email message from you. Click "Next" to continue.
NOTE: If you setup any email aliases for your email address within your DNI control panel, you can enter your email address or any of your email aliases here. For example, if Jane Doe's last name had changed to Smith, she could simply create an email alias of "jsmith@example.com" for her address, and then enter this new email alias here so that other people would see her new "jsmith" email address.
-
Choose POP3 server, type POP3 server name, type SMTP server name, then click "Next"
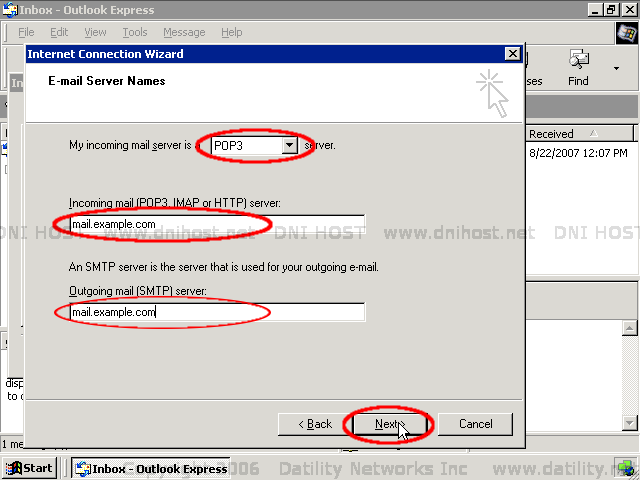
Your incoming mail server will normally be a "POP3" server. Your incoming POP3 mail server and your outgoing SMTP mail server names will normally be the same. Type "mail.dnihost.net" or "mail." followed by your domain name (everything after the "@" in your email address) in each field. Click "Next" to continue.
-
Type account name, type username, then click "Next"
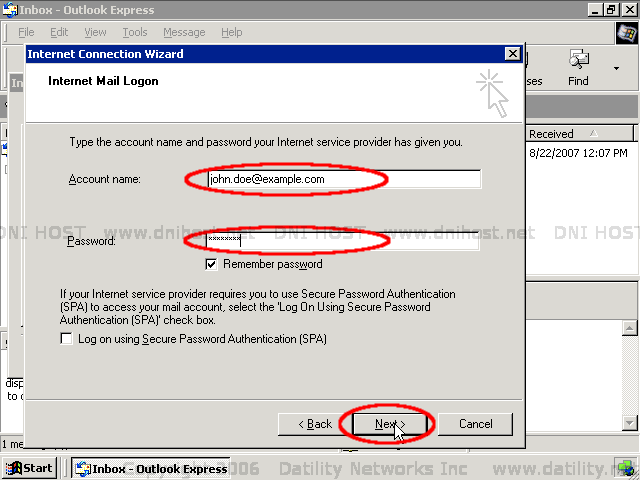
Type your account name (this is your PRIMARY email address) in the "Account name" field, then type your password in the "Password" field. Click "Next" to continue.
NOTE: You should test your email address and password by logging into the DNI Webmail site. If you are unable to login to the DNI Webmail site, you are using the wrong email address or password.
-
Click "Finish" to continue. You are NOT done!
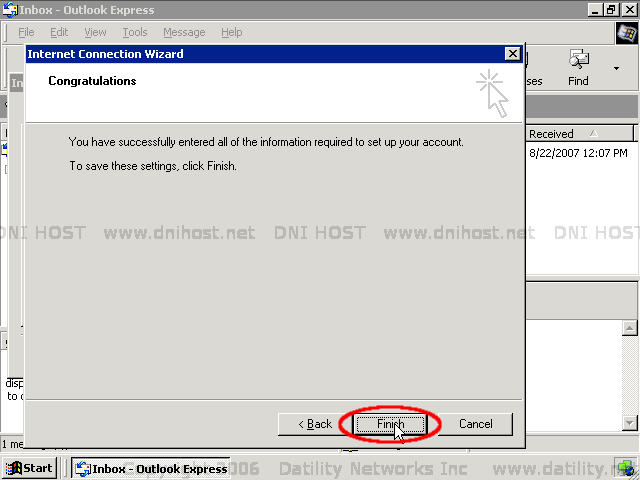
Click "Finish" to close the setup wizard. You must continue following the steps below to fine tune your account.
-
Click "Tools"
After you have finished the setup wizard, continue by choosing the "Tools" dropdown menu.
-
Click "Accounts"
Next, click on the "Accounts" menu item to view your Internet Accounts setup window.
-
Click the "Mail" tab, select your DNI mail account, then click "Properties"
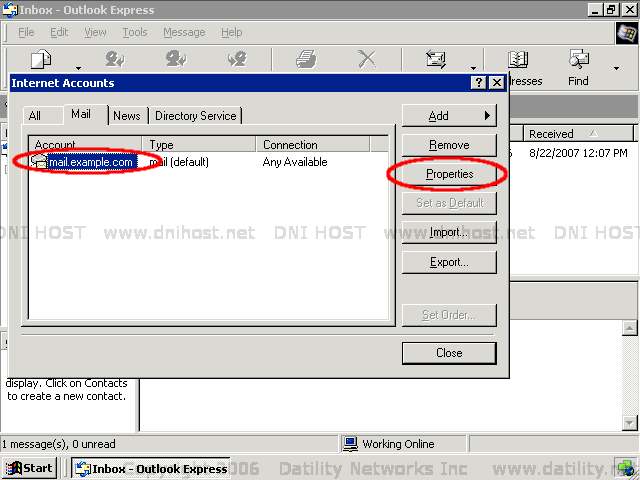
When the Internet Accounts window appears, click on the "Mail" tab, click on your DNI mail account to select the account, then click the "Properties" button to view the Account Properties window.
NOTE: If your DNI mail account is not already listed as your default account (Type should be "mail (default)"), we recommend you click the "Set as Default" button to make your DNI mail account the default account.
-
Review General settings, then click "Servers" tab

When the Account Properties window appears, you should see the General account settings. Review the Name and E-mail address fields for accuracy, then click the "Servers" tab to continue.
-
Update Outgoing Mail Server settings, then click "Settings" button
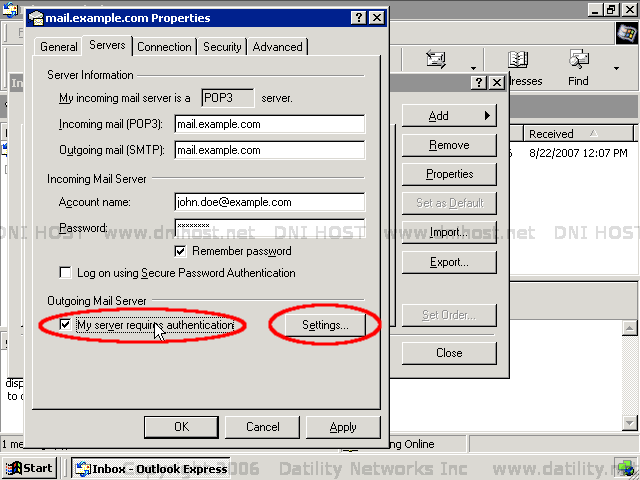
ENABLE the option "My server requires authentication" then click the "Settings" button to continue.
NOTE: If you do not enable this option, you will only be able to send email to other DNI customers. You will receive "relaying denied" (or similar) error messages when you try to send email to non-DNI customers.
-
Review Outgoing Mail Server settings, click "OK"
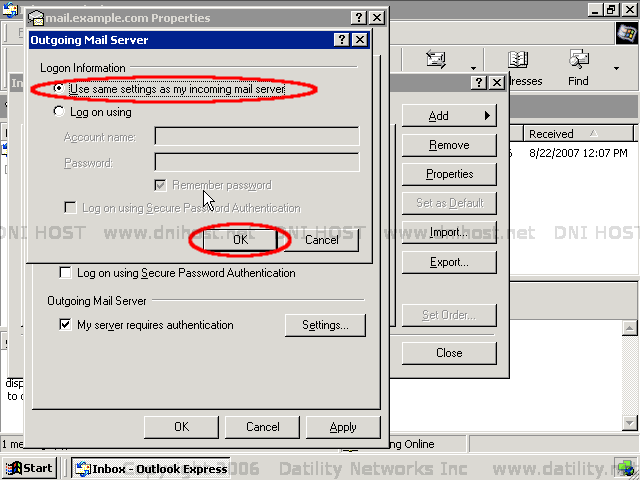
Confirm that Logon Information is set to "Use same settings as my incoming mail server", then click the "OK" button to continue.
NOTE: If this is not set correctly, you may be prompted for your account username and/or password each time you try to send email.
-
Review Servers settings, then click "Connection" tab
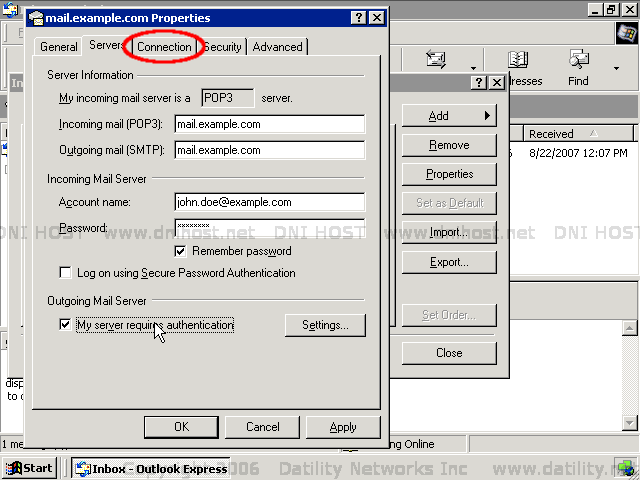
Review the Incoming mail, Outgoing mail, and Account name fields for accuracy, then click the "Connection" tab to continue.
-
Review Connection settings, then click "Security" tab
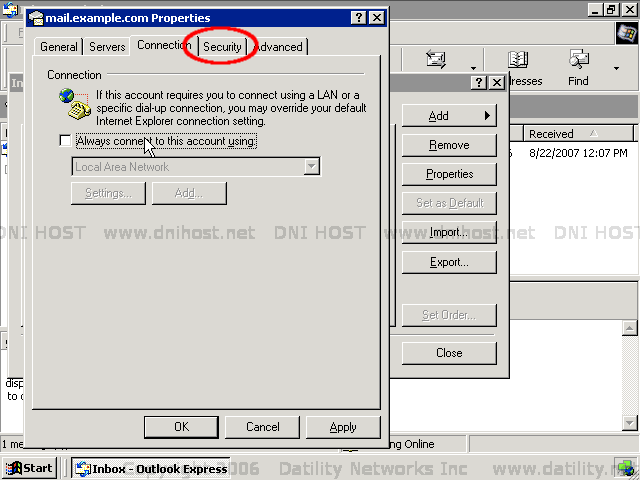
Read the note below and take action as necessary, then click "Security" tab to continue.
NOTE: The "Always connect to this account using" checkbox should be disabled, UNLESS you are using dialup internet to check your email and seem to be having problems checking your email. If you are using dialup internet and seem to have problems checking your email, enable this checkbox and choose your dialup account. This will force Outlook Express to use the correct dialup account to check your email.
-
Review Security settings, then click "Advanced" tab
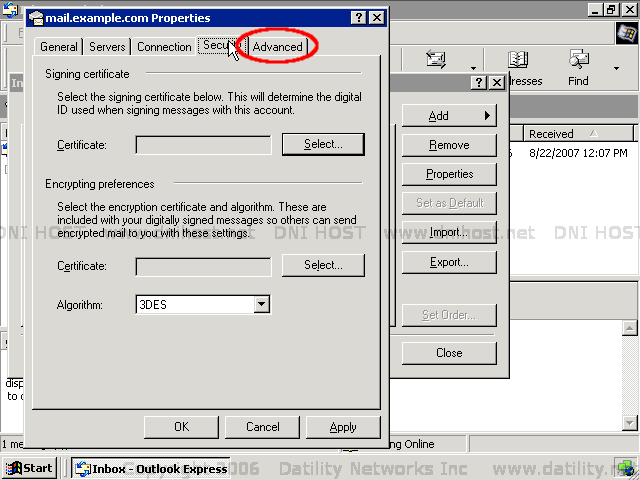
Review your security settings. You will not normally change these settings. Click the "Advanced" tab to continue.
-
Update Advanced settings, then click "OK" to finish
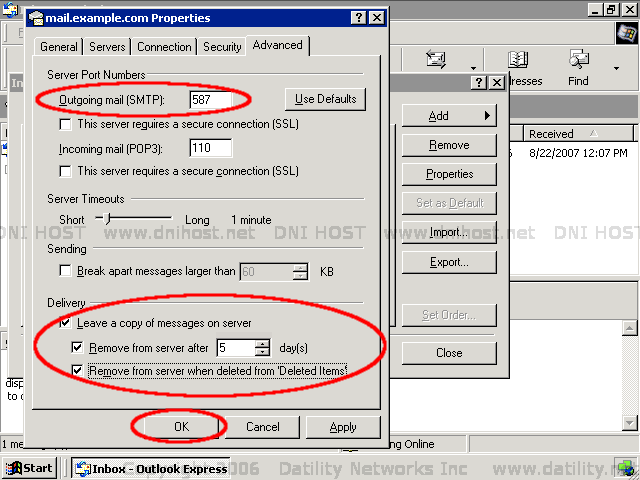
You should update the following settings on the Advanced settings page, then click "OK" to close the Account Properties window.
- The "Outgoing mail (SMTP)" setting should change from "25" to "587".
Most internet providers block port 25 to help prevent the spread of SPAM. Changing this setting to 587 allows you to continue sending your outgoing mail directly through DNI.
- The "Leave a copy of messages on server" option should be ENABLED.
Be sure to enable the next option too, or your mailbox will fill up. When this happens, any new messages are returned to sender with an error saying your mailbox is full. This option allows you access to your recent email through the DNI Webmail site since recent copies of your messages will be kept on the DNI servers.
- The "Remove from server after X days" option should be ENABLED and set to "5" days.
Although we recommend 5 days, you could adjust this option. If you set this option too high (ie: 20 days), your mailbox may fill up and bounce all of your new email.
- The "Remove from server when deleted from Deleted Items" option should also be ENABLED.
When this option is enabled, any email you delete in Outlook Express will be deleted from the server. If you use DNI Webmail, you will not need to see messages you have already deleted in Outlook Express.